How to Maintain Your Ceramic Coating: The Complete Care Guide
Learn the proper maintenance routine for ceramic coated vehicles in the Boise area. From wash techniques to seasonal care, this guide helps you maximize coating longevity.
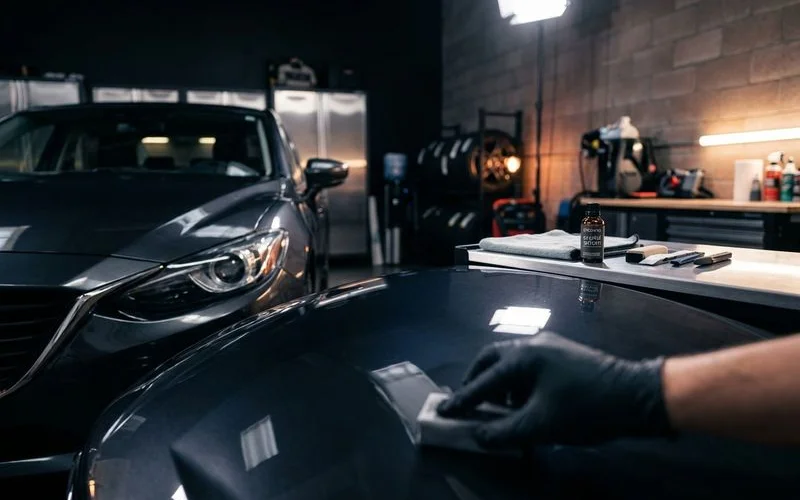
We often tell our clients that the day you pick up your vehicle is not the finish line. It is actually the starting line. How to Maintain Your Ceramic Coating: The Complete Care Guide begins with understanding that this protection is an investment, not a magic forcefield. Our team has seen countless $1,500 ceramic coating packages ruined in less than six months due to improper care.
You might be surprised to learn that the primary cause of coating failure isn’t the product itself. The culprit is usually “traffic film,” a sticky layer of oil and grime that clogs the coating’s pores. This masks the hydrophobic properties you paid for.
We are going to walk you through the exact protocols we use in our shop to keep coatings performing like new. These steps will help you maximize the three to five-year lifespan of your protection.
Why Maintenance Matters Even With Ceramic Coating
A ceramic coating is not a maintenance-free solution. We encounter this misconception frequently, and it often leads to premature degradation of the protective layer. The reality is that a properly maintained ceramic coating can last three to five years. A neglected one may begin failing in less than twelve months.
Our team emphasizes that the coating creates a sacrificial barrier. This shield can be overwhelmed by prolonged exposure to contaminants that you do not remove quickly. In US regions with four distinct seasons, vehicles encounter road salt, mineral-heavy water, industrial fallout, and acidic pollen. Consistent maintenance separates a coating that retains its gloss for years from one that deteriorates after a single winter.
You should view ceramic coating maintenance as straightforward but deliberate. The techniques are not complicated. They simply require more attention to method than a standard car wash to prevent marring the finish.
The Correct Wash Method for Coated Vehicles
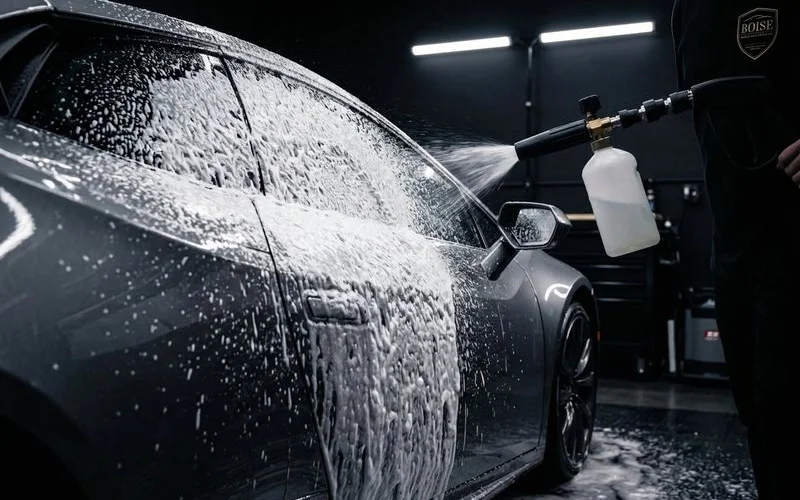
Pre-Rinse and Foam Application
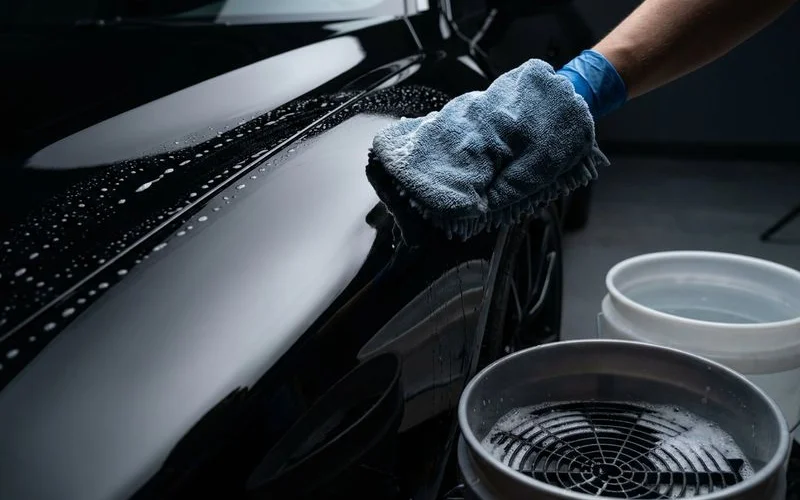
Every wash must begin with a thorough water rinse to remove loose dirt and heavy debris. We recommend following the rinse immediately with a foam cannon or foam gun to encapsulate remaining particles. This step is critical because dragging dry contaminants across the surface with a wash mitt creates micro-scratches. These tiny marks reduce gloss and clarity over time.
Allow the foam to dwell for three to five minutes. Gravity will pull the encapsulated dirt down and off the paint during this time. You must not let the soap dry on the surface, especially during hot summer days. Working in shaded areas or washing early in the morning prevents premature drying.
Two-Bucket Wash Technique
We strictly advise using the two-bucket method to protect your paint. One bucket holds your wash solution, and the second bucket contains clean rinse water with a grit guard insert. You dip your wash mitt in the soapy bucket, wash a single panel, and then rinse the mitt thoroughly in the clean water bucket. This process ensures you never reintroduce contaminated water to the paint.
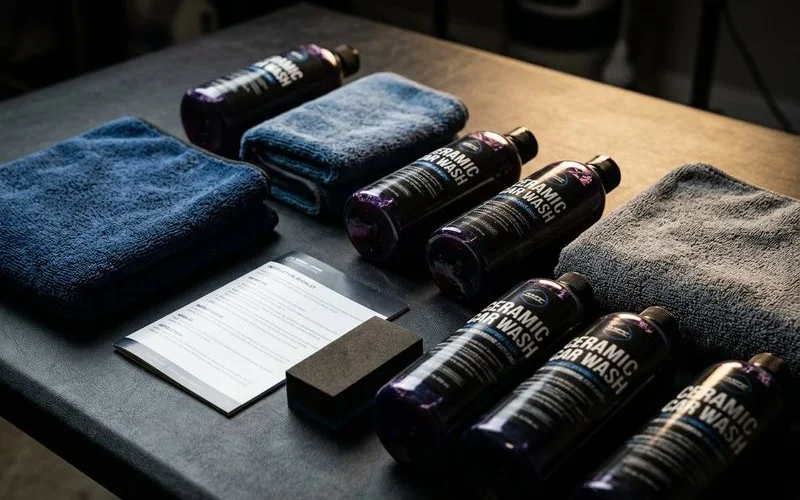
Our technicians suggest using a pH-neutral car wash soap specifically. High-alkaline detergents or dish soaps often have a pH of 9 or higher, which can strip the coating’s hydrophobic top layer. A dedicated ceramic shampoo typically sits at a safe pH of 7 and often includes SiO2 (silicon dioxide) additives to boost protection.
| Feature | Standard Car Soap | Ceramic Specific Soap |
|---|---|---|
| pH Level | Often Alkaline (8-10) | Neutral (7) |
| Lubricity | Moderate | High (Reduces scratching) |
| ** additives** | Wax or Polymers | SiO2 or Ceramic Boosters |
| Safety | Good for bare paint | Best for coated paint |
Proper Drying Methods
Drying is where many vehicle owners unknowingly damage their finish. We advise against using chamois leather, bath towels, or squeegees. These tools often trap dirt and drag it across the surface. A high-quality microfiber drying towel with a density of at least 500 GSM (grams per square meter) or a filtered air blower is the safest option.
You should pat or blot the surface rather than wiping aggressively. Friction is the enemy of any paint surface. For areas with hard water, drying promptly is essential to prevent calcium and magnesium deposits from etching the coating as the water evaporates.
Pro Tip: We have found that using a “twisted loop” microfiber towel absorbs water significantly faster than standard plush towels. This specific weave reduces the number of passes needed to dry a panel, lowering the risk of swirl marks.
Wash Frequency Guidelines
For most daily-driven vehicles in the US, washing every two weeks is a solid baseline. We recommend adjusting this frequency based on your specific local conditions and season.
Seasonal Adjustments
- Winter: Road salt and liquid de-icers like magnesium chloride are highly corrosive. Weekly washing is necessary to prevent chemical bonding.
- Spring: Pollen is often acidic and can stain the coating if activated by light rain. Rinse these deposits off every few days.
- Summer: Bug splatter contains enzymes that etch paint quickly in heat. Remove bug residue within 48 hours.
- Fall: Decaying leaves release tannins that stain surfaces. Remove fallen leaves immediately.
Products to Use and Avoid
Recommended Products
We have identified specific tools that enhance the longevity of your coating.
- pH-neutral car wash soap: Look for labels that specify “wax-free” and “gloss-enhancing.”
- Ceramic coating maintenance spray: Use this “booster” every 3-4 washes to top up the hydrophobic effect.
- Dedicated glass cleaner: Ensure it is ammonia-free and safe for coated glass.
- High-quality microfiber towels: An 70/30 blend (polyester/polyamide) offers the best softness.
- Iron remover: Use this chemical spray every three to four months to dissolve brake dust.
Products to Avoid
Our experience shows that certain common products can ruin a coating in minutes.
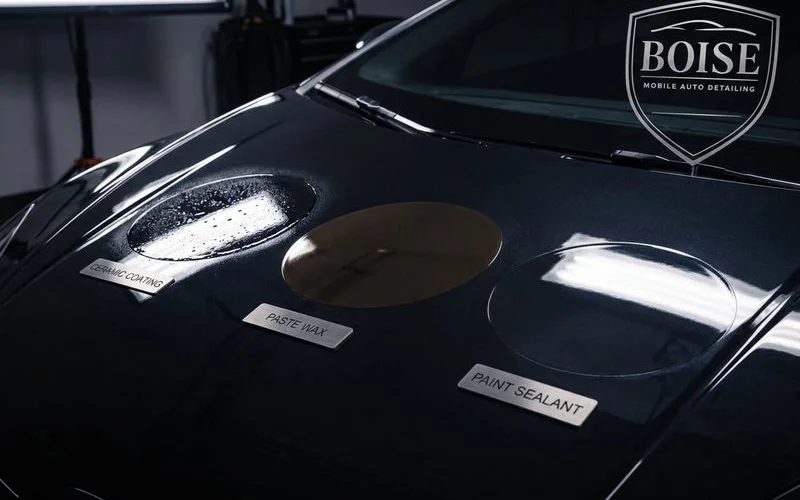
- Abrasive polishes: These are designed to cut clear coat and will remove the ceramic layer entirely.
- Paste Waxes: Natural waxes can clog the pores of the ceramic coating, reducing its self-cleaning ability.
- Automatic car washes: The nylon brushes at these facilities act like sandpaper on your finish.
- Clay bars: Avoid using clay unless you plan to polish and re-coat, as it often mars the surface.
Seasonal Maintenance Strategies
Pre-Winter Preparation
We recommend a professional maintenance wash and booster application before the first freeze. This service ensures the coating has maximum thickness to withstand road salts. You should also inspect the lower rocker panels, as these areas take the brunt of road spray and gravel impact.
Spring Decontamination
After winter, a chemical decontamination wash is vital to remove embedded ferrous particles. We use iron remover sprays that react with iron deposits from brake dust and plow blades. The product turns purple upon contact, indicating it is dissolving the contaminants chemically rather than mechanically.
Summer UV Management
Ceramic coatings provide excellent UV protection, but cumulative exposure still takes a toll. We suggest parking in the shade or using a car cover if you lack a garage. Surface temperatures on a dark vehicle can exceed 160 degrees Fahrenheit in direct summer sun. This heat can bake contaminants into the coating if the car is dirty.
When to Schedule Professional Maintenance
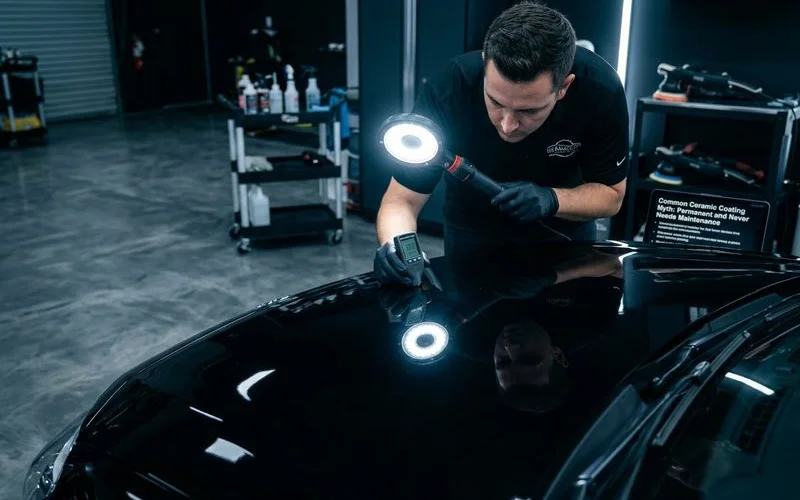
Even with diligent home care, a professional exterior detailing service every six to twelve months provides deep cleaning benefits. We perform a “reset” wash that unclogs the coating’s pores using specialized cleaners not typically found in retail stores.
A trained eye can also spot early signs of failure. Our team looks for high-traffic areas where the coating might be thinning. Catching these issues early allows for spot repairs rather than requiring a full vehicle re-coating later.
Signs Your Coating Needs Attention
Pay attention to the physical behavior of water on your paint.
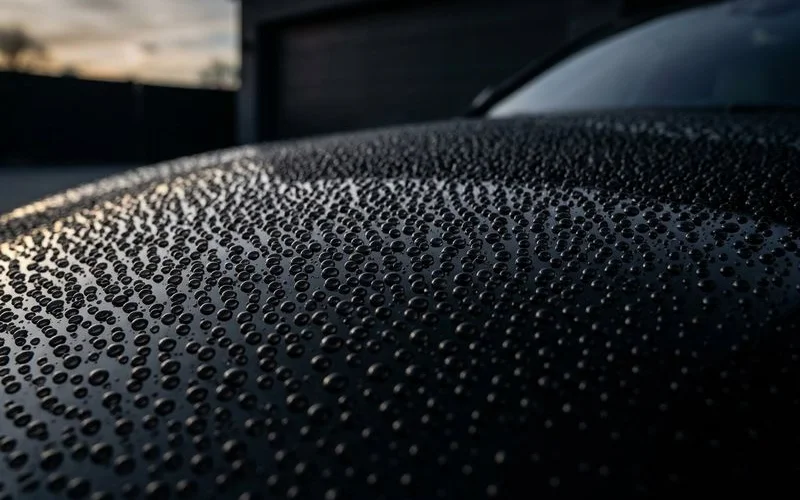
- Loss of Hydrophobics: Water sheets slowly instead of beading up tightly.
- Rough Texture: The paint feels like sandpaper rather than glass (indicating embedded contamination).
- Visible Water Spots: Mineral deposits are not coming off with a standard wash.
- Dull Appearance: The deep “wet look” has faded.
These signs do not always mean the coating is gone. We find that in 80% of cases, a chemical decontamination restores the performance. The “clogged” coating just needs the traffic film removed to function correctly again.
Protecting Your Investment
A ceramic coating is a significant financial commitment to your vehicle’s value. We know that the maintenance required to keep it performing is manageable. It requires consistency and the right chemicals rather than hard labor. The reward is a vehicle that stays cleaner longer and retains a higher resale value than its unprotected counterparts.
If you are unsure which products best suit your specific coating brand, reach out to your installer for a verified list. Sticking to the plan we outlined here will ensure your investment continues to pay off for years to come.
Boise Mobile Auto Detailing Team
Professional detailing specialists serving Boise and the Treasure Valley.